Included the moment you install it
No account required for anything in this section.
📈 Dashboard Earnings
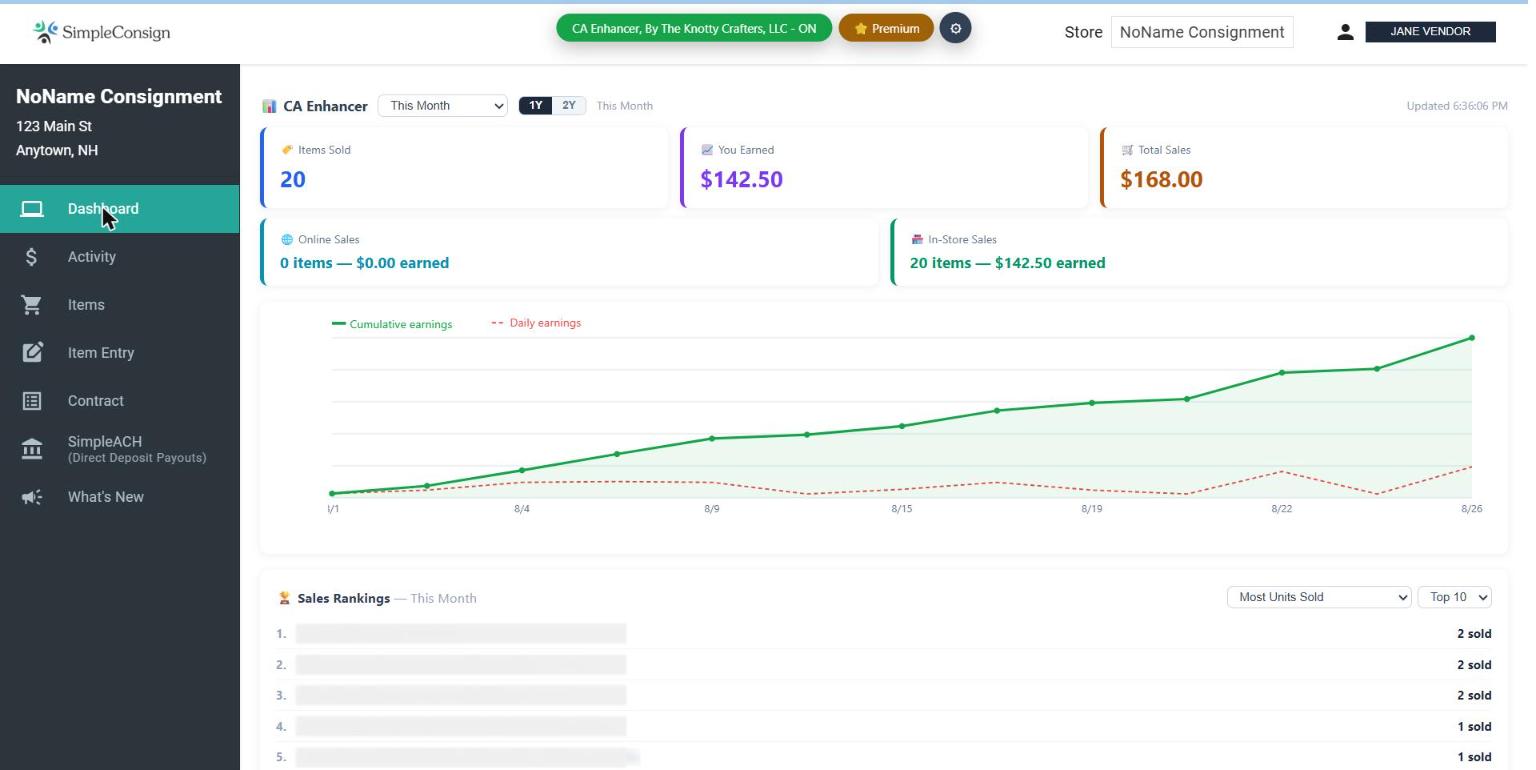
Dashboard pageAdds a graph to your Dashboard showing two lines: your cumulative earnings (running total, solid line) and your daily earnings (dashed line) over your selected date range. Each line has its own scale so a busy single day doesn't flatten the running total, or vice versa.
📋 Better Activity & Items Pages
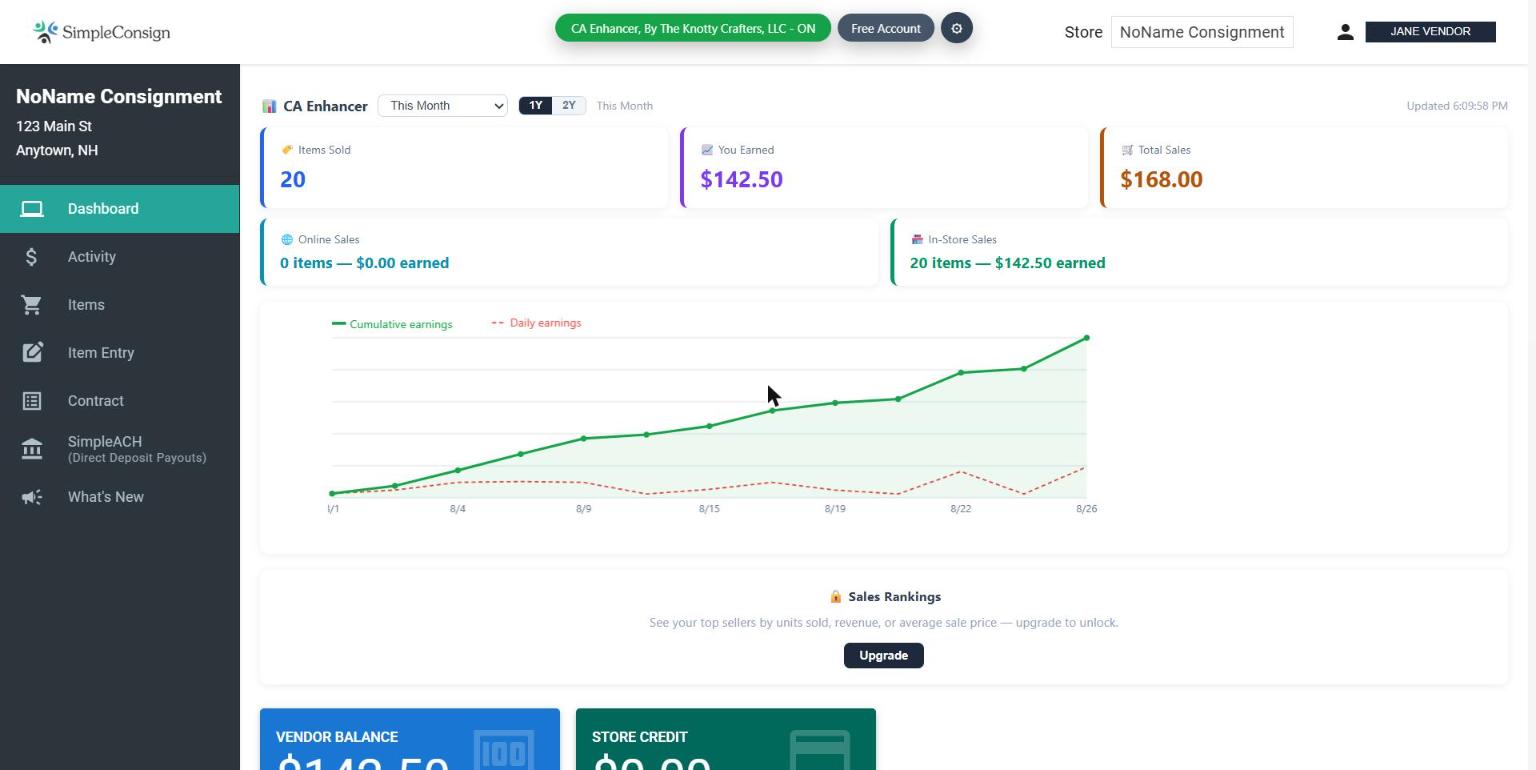
Activity page · Items pageItem details that ConsignorAccess crams into one description column get split out into their own Category, Brand, and Size/Color columns — each one independently sortable and resizable. Any column can be hidden entirely from a checklist ("Uncheck to hide column") if you don't use it.
🔎 Quick Filters
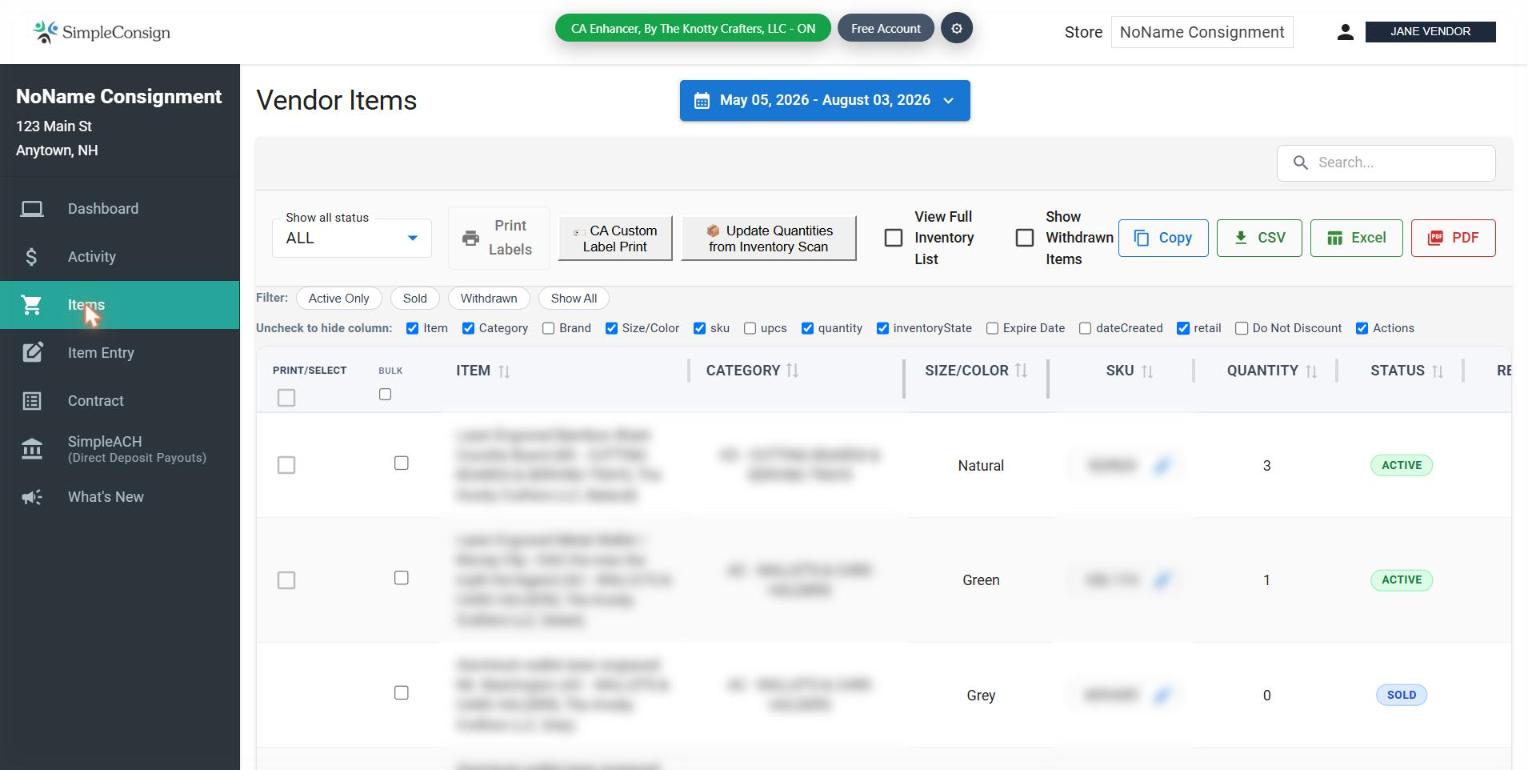
Activity page · Items pageOne-click filter buttons sit right above the table on both pages, so you don't have to dig through ConsignorAccess's native filter controls for something you check constantly.

📄 Copy → New Item
Items pageTurn a sold item back into a fresh listing in one click — its details carry over and pre-fill a new item form automatically, instead of you retyping everything for a restock.
How to copy an item:
- Open the item you want to duplicate (click into it to bring up Edit Item Details).
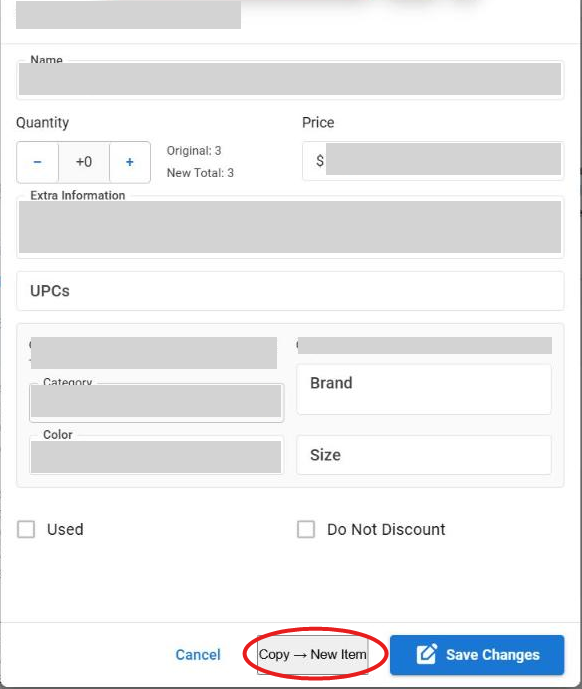
- Click Copy → New Item, circled below.
- You're taken straight to the Add New Item page with everything already filled in — name, price, description, color, size, category, and brand. Quantity is the one exception, left at the form's normal default rather than copied, so a restock doesn't silently duplicate the old stock count.
- Review the pre-filled details, change anything that needs it for this new listing, and save as usual.
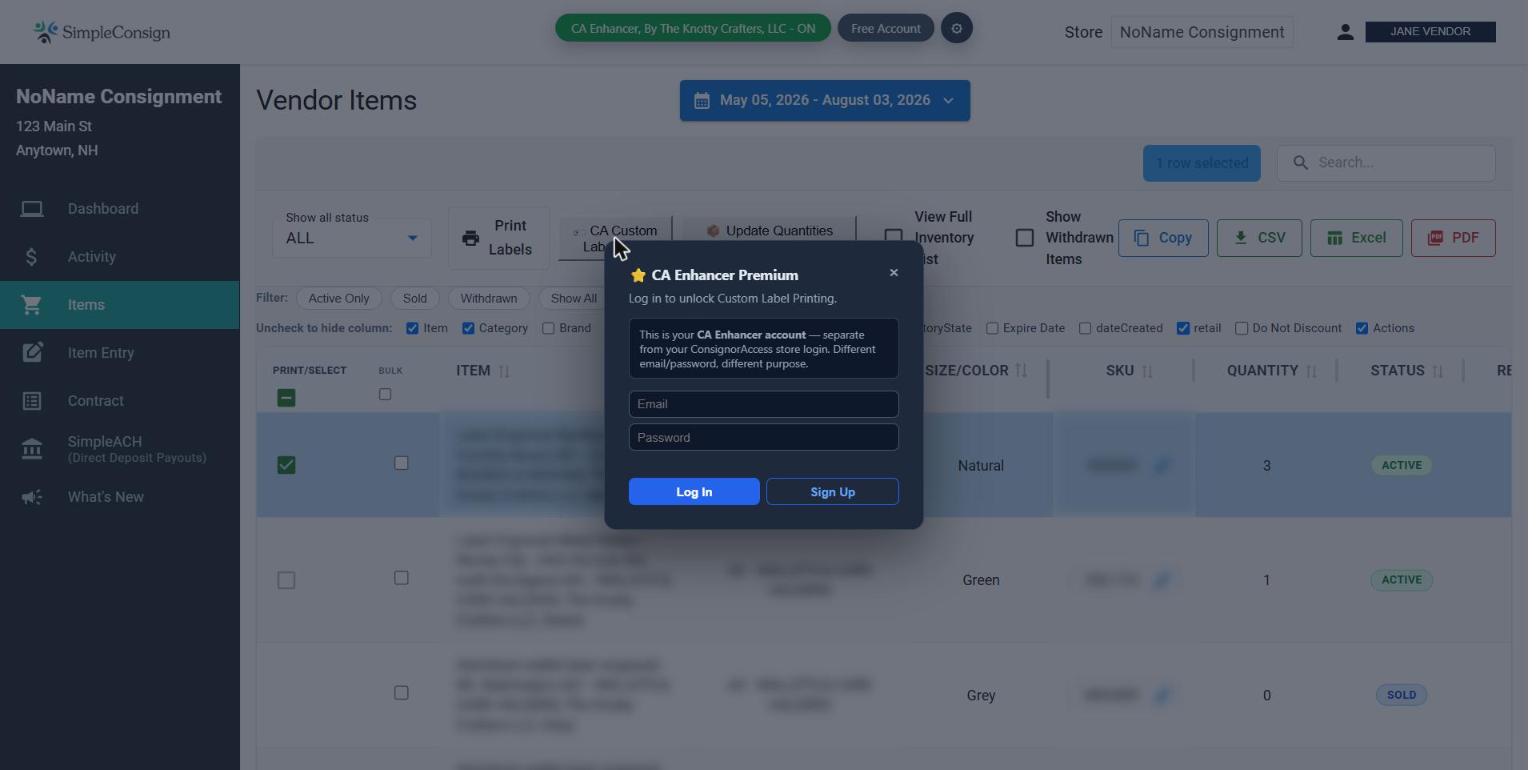
Unlocked with a CA Enhancer account
Starting at $5/month — see pricing. Each feature below shows an upgrade prompt if you're not yet subscribed, or if this particular store isn't linked to your account.
🏷️ Custom Label Printing
Items pageSelect items on the Items page and print consistent, professional labels for them — no separate label software needed.
How to print labels:
- Go to the Items page.
- Check the box in the PRINT/SELECT column for each item you want a label for. (This is a different column from the BULK checkboxes used for bulk editing — don't mix them up.)
- Click CA Custom Label Print in the toolbar. (Not the plain "Print Labels" button next to it — that's ConsignorAccess's own separate tool, not this one.)
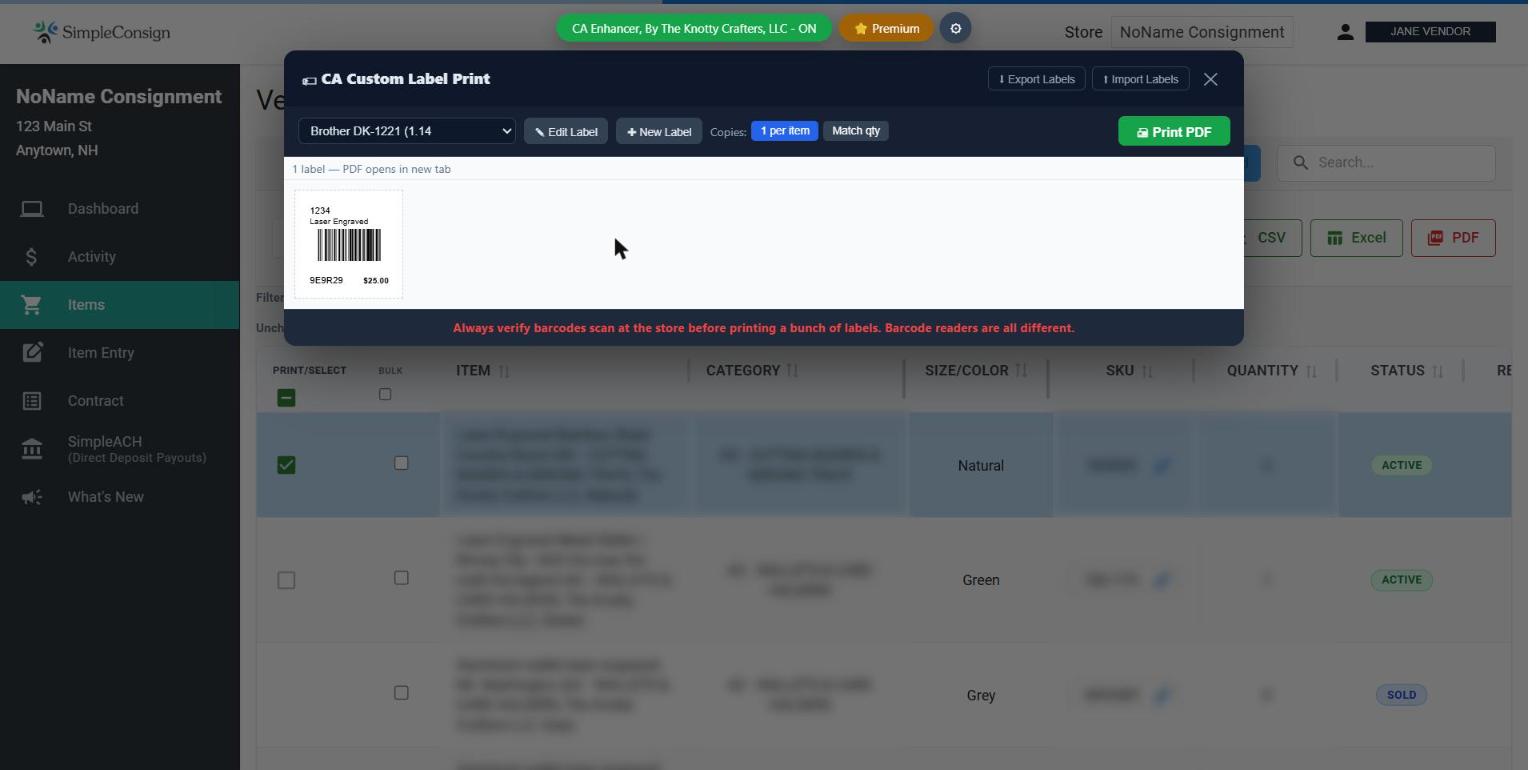
- A preview opens showing one label per selected item, using your current template (e.g. "Brother DK-1221").
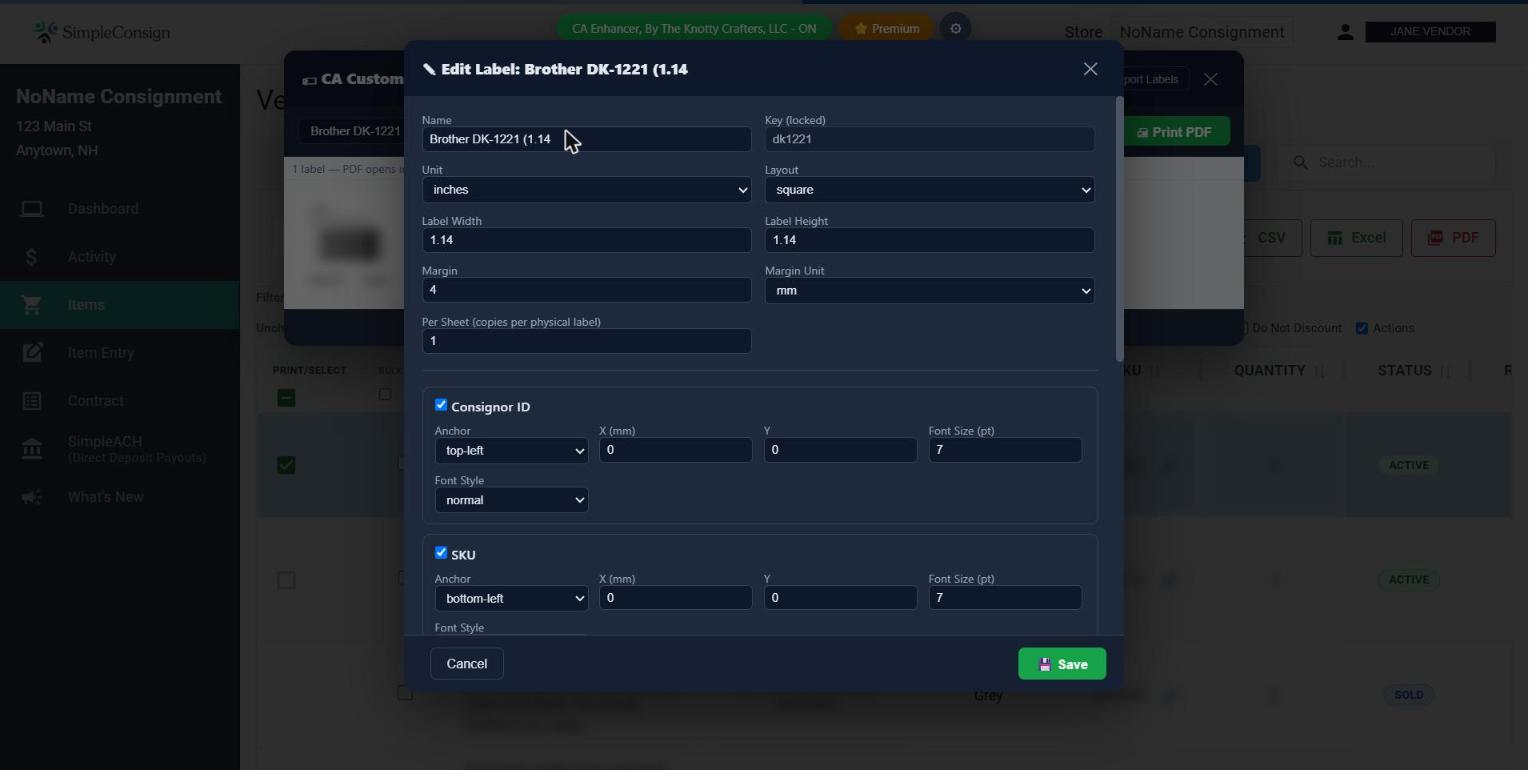
- Want a different look? Click Edit Label to adjust layout, size, margins, and the position/font of each text element (Consignor ID, SKU, price, etc.) — or New Label to start a fresh template from scratch. Layout options include rectangle, square, or barbell shape, sized in inches or millimeters, plus a dedicated Avery 5160 preset for standard sheet-fed printer labels.
- Set Copies to "1 per item," or "Match qty" to print one label for every unit you have in stock.
- Click Print PDF — it opens in a new tab, ready to send to your printer.
- When your browser's print dialog opens, check the print settings before printing: set Scale to 100% or "Actual size" (not "Fit to page/printable area" — that shrinks the label and throws off barcode alignment), and turn margins down to "None" or "Minimum." Also double-check the selected paper size matches your actual label stock (e.g. the individual label size for a label-roll printer, or the full sheet size for Avery 5160).
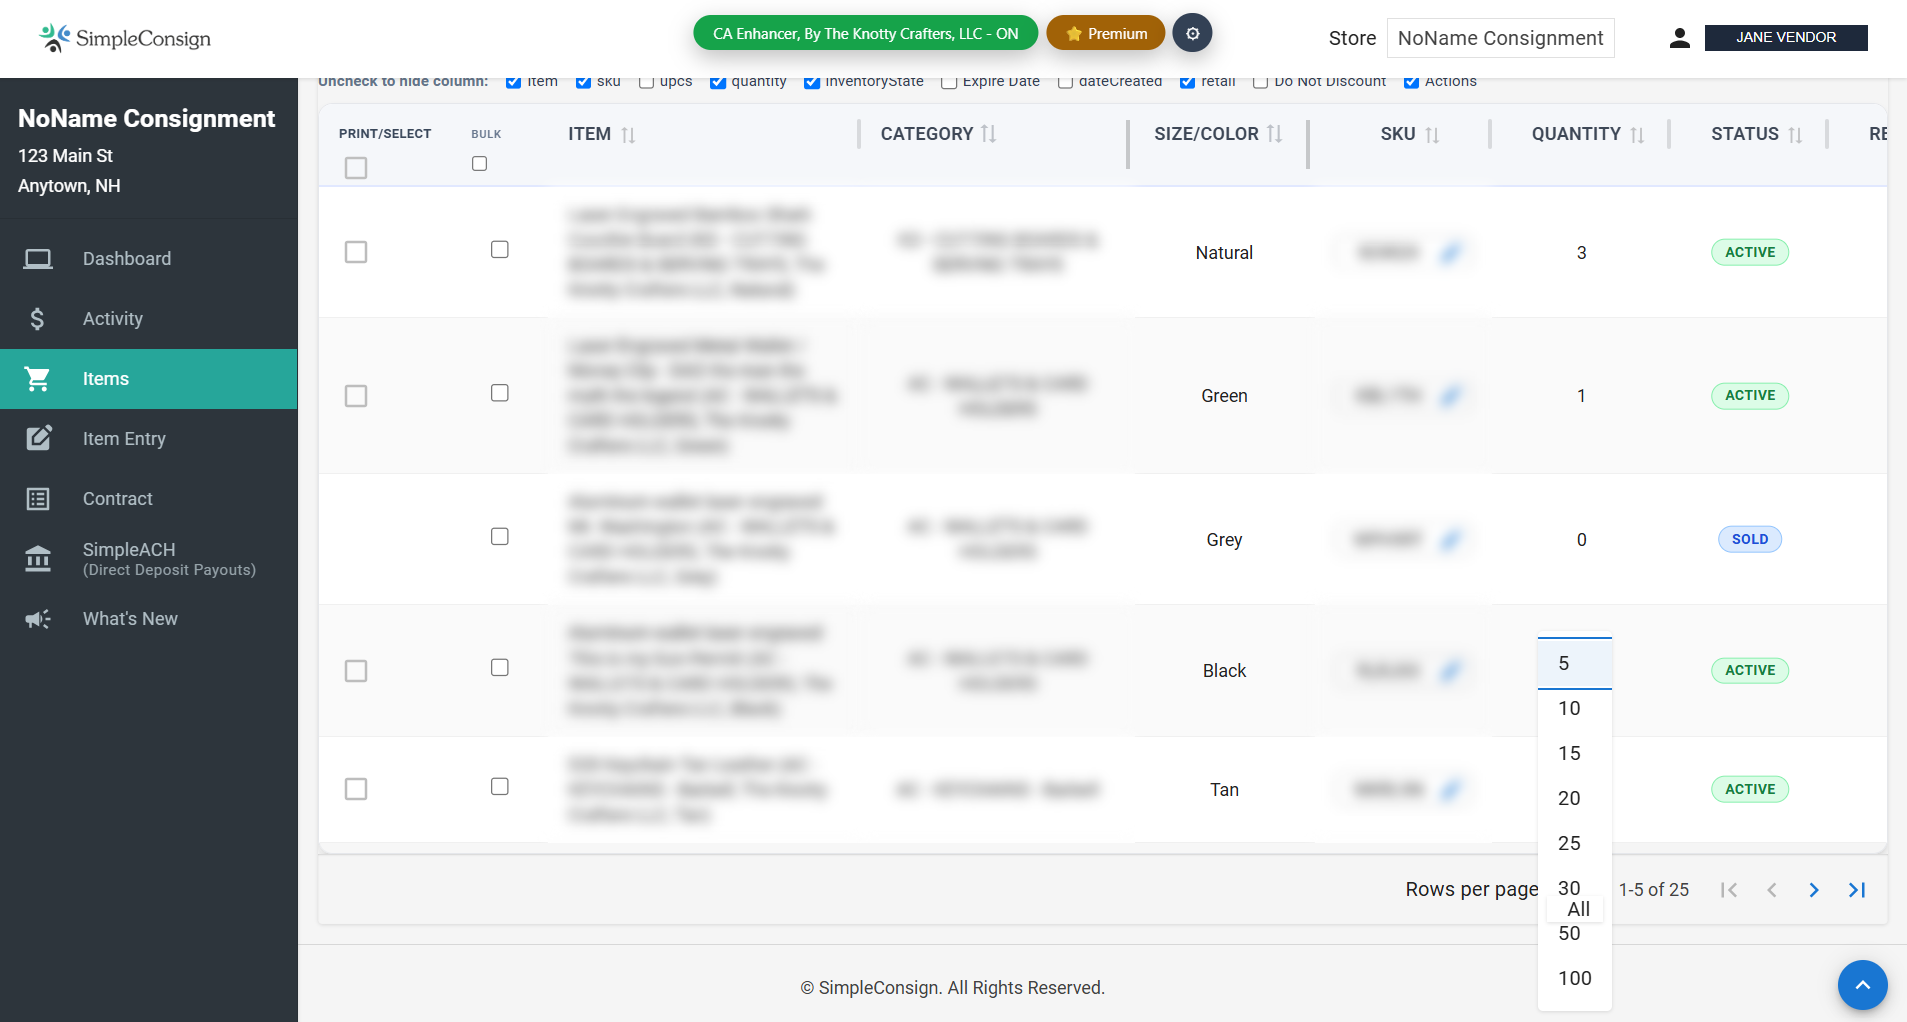
- Search or filter first — narrow the Items page down to just the set of items you want labels for (e.g. search by brand, category, or SKU), so everything you need fits on one page.
- Use "All" rows per page — at the bottom of the Items table, open the "Rows per page" dropdown and pick All to load every item onto a single page, then select from the full list.
✏️ Bulk Item Editing
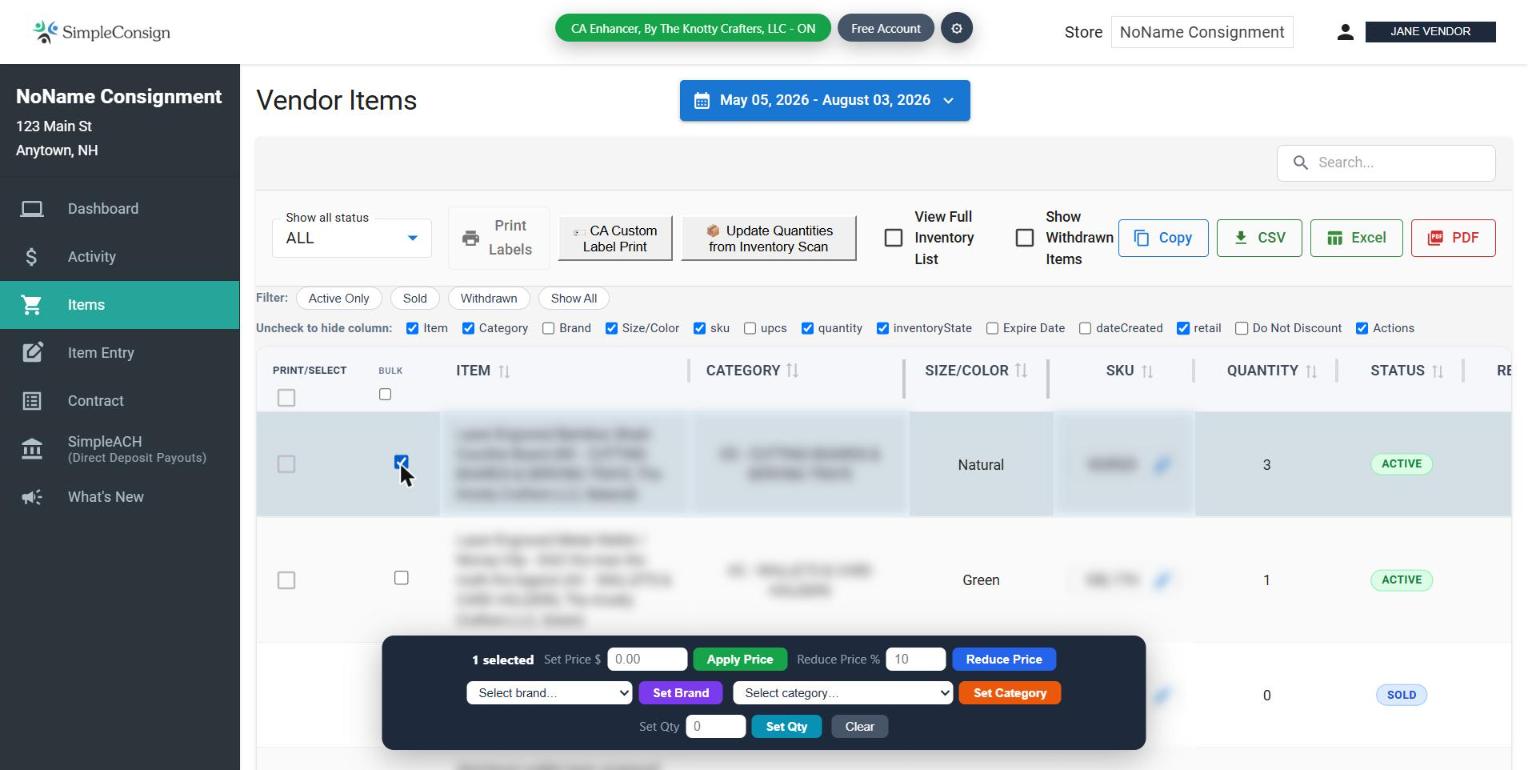
Items pageCheck the box next to multiple items on the Items page and a bulk-actions bar appears, letting you apply one change to every selected item at once instead of opening each item individually.
How to bulk-edit:
- Go to the Items page.
- Check the box in the BULK column for each item you want to change. (Different column from PRINT/SELECT, which is only for label printing.)
- A bar appears at the bottom showing how many items are selected, with controls for Price, Brand, Category, and Quantity.
- Fill in the value you want — e.g. type a new price, or pick a brand from the dropdown.
- Click the matching button: Apply Price, Reduce Price (percentage off), Set Brand, Set Category, or Set Qty.
- Review the confirmation that appears — it lists exactly what's about to change — then confirm.
- All selected items update at once, no need to open them individually.
📊 Sales History Reports
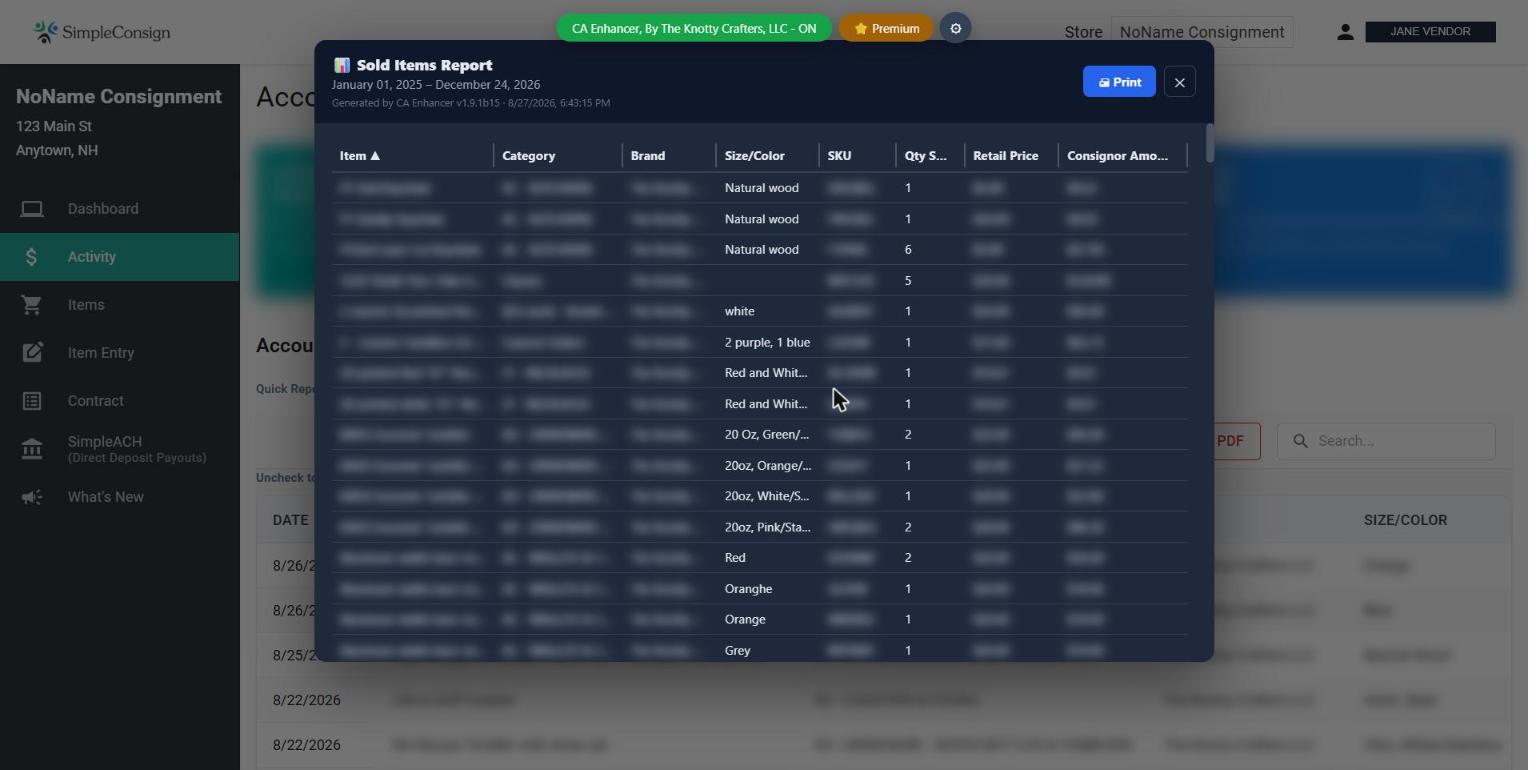
Activity pageThe Sold Items Report pulls together everything you've sold into one clean, printable view instead of digging through the Activity page row by row.
How to view a sales report:
- Go to the Activity page.
- Pick a date range — use a Quick Report shortcut (Last 7 Days, This Month, Last Month, YTD, Last Year) or set a fully custom range at the top.
- Click View Sold Items.
- The Sold Items Report opens, listing every sale in that range with Item, Category, Brand, Size/Color, SKU, Qty Sold, Retail Price, and your Consignor Amount.
- Click Print to print it directly from your browser — no export or download step needed.
🔔 Sale Notifications
Account portal — app.theknottycraftersllc.comGet notified by email, text, or both whenever a sale is detected — checked roughly once an hour, not instantly. Notification settings live in the account portal, not inside the extension itself.
How to set up notifications:
- Go to app.theknottycraftersllc.com and log into your CA Enhancer account (separate from your ConsignorAccess login).
- Find the Notification Destination card. Email notifications already work automatically off your login email — nothing to do there.
- Want texts too? Enter a US phone number, check the SMS consent box right above the Save button, then click Save.
- In your Linked Store Locations list, find the store you want to change and click its 🔔 Notifications button.
- Choose SMS (or switch back to Email), then Save. Each store defaults to Email until you change it.
- Click Send Test Notification to confirm the channel actually works before relying on it.
Multiple sales in the same hour, or sales across several stores on the same channel, get combined into a single notification rather than one message per sale. More delivery details are covered in the Setup Guide and the FAQ.
📦 Inventory Counting & Scanning
Account portal — app.theknottycraftersllc.comReconciles your physical inventory against what ConsignorAccess has on file.
How to run a count, start to finish:
- Go to app.theknottycraftersllc.com and open the inventory tool.
- Click Start Count and choose a scope:
- Full Inventory — the whole store
- Partial Count — a section or category
- Spot Check — a quick report-only check; nothing gets written back to ConsignorAccess
- Wait for the baseline to pull automatically from ConsignorAccess — this can take up to a minute. If the live pull doesn't work, upload a CSV export instead.
- Count your physical items, using either or both:
- The mobile scanning page — open it on your phone and point the camera at barcodes as you walk the shelves
- The desktop inventory page — check items off a list
- When you're done, close the count.
- Review the discrepancy report — missing items, items needing follow-up, withdrawn items, anything not yet counted — and print or email it.
- For Full/Partial counts, click Write Back to CA Now to apply the corrections directly to ConsignorAccess. This is only available for one hour after closing the count, as a safety window against overwriting a real sale or edit made since. (Spot Checks skip this step entirely — report only.)
🏆 Sales Rankings
Dashboard pageRanks your items by units sold or revenue over the same date range as the Dashboard Earnings graph above it, so you can see your best (and slowest) sellers at a glance without building a report yourself.